
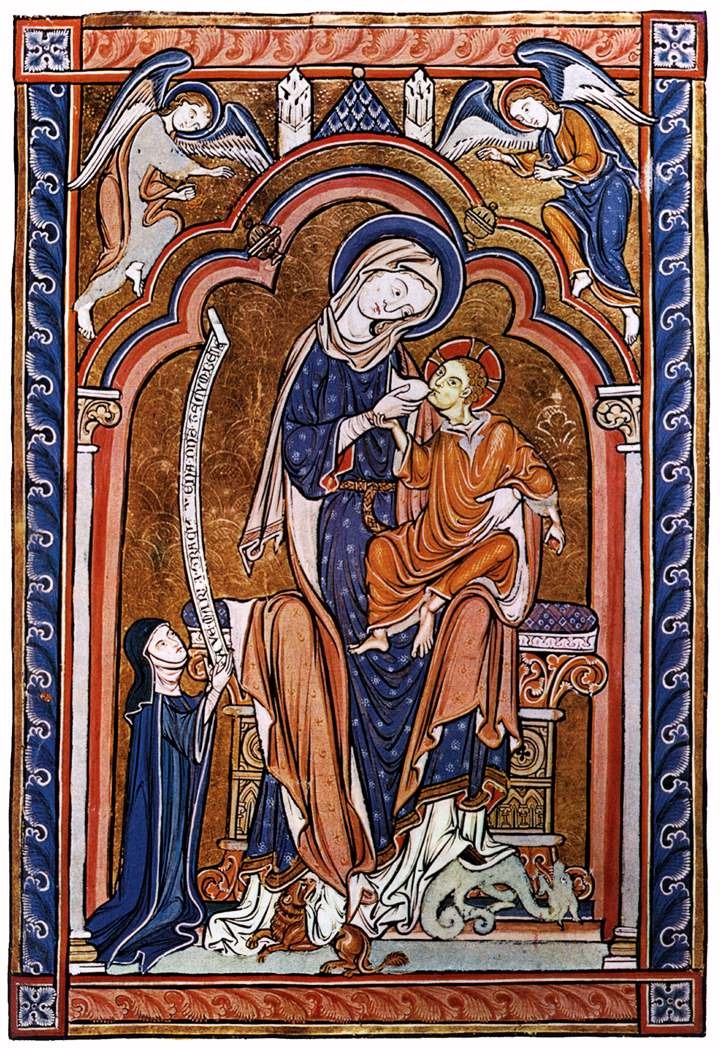
I’ve been hard at work on the new frock based on the Amesbury Psalter image. Over the past couple of weeks I’ve been able to:
- cut and assemble the lining of the overdress, and
- decide on my embroidery design and begin the embroidery.
There were really helpful comments on ‘The Manuscript Challenge’ in response to my first blog. A great deal of debate centred on the pros and cons of using linen as a lining, as I had been intending. Linen is a very effective wick, and it will soak up water from the ground, causing not only itself but also any accompanying wool to become waterlogged. This has led many to choose not to use linen as a lining, and I was forced to reconsider this option. However, in the end I decided to stick with linen for the lining of my overdress. For one thing, the overdress is not full length and so should not come into contact with moist ground too easily. Secondly, I have actually pretty much always used linen for my linings, even on full-length dresses, and I have not found it too much of a problem (even in the English climate!) Having acquired a nice lightweight linen in red, I decided to use it as originally planned.
Measuring and cutting the pieces for the overdress lining gave me a chance to experiment with the design, based on ideas from the St Claire of Assisi gown (below, right) and the Empress Matilda dalmatic (below left, details for both on my Pinterest):


As can be seen, both of these extant garments allow for considerable extra volume with wide gores. Both have a relatively narrow central rectangular piece, with extra pieces added from the shoulder line and slanting out all the way to the bottom hem. These full length gores are on the reverse of the St Claire gown but on both front and back of the Empress Matilda dalmatic. The St Claire gown then has extra gores added lower down as well.
I wanted to have plenty of volume, and also front seams over the bust, that could be opened out for nursing purposes, so I had the full-length gores on the front and back of the garment – something like the Matilda dalmatic, but not so wide across the shoulder. Here’s the design I came up with, which is relatively close to the St Claire gown, but with full-length side gores and a simpler, more open sleeve.

This worked well and felt comfortable and voluminous when on while fitting nicely at the shoulders. This has provided me with the models for cutting the pattern pieces in wool for the outer of the overdress.
It was time to start on the outer. I wanted to establish the design of the pearly ‘stars’, and decided to cut the two sleeve pieces and work on them first. If the embroidery just didn’t work for some reason I would not have wasted too much of my beautifully soft blue woollen fabric! Starting with the sleeve also meant I could examine the original image and see how many ‘stars’ there were on the loose sleeve and get an idea of spacing on my garment. In the end I decided to go for ‘stars’ spaced 3.5 inches apart, measuring from centre to centre.


Each star is composed of (1) a central pearl of 5-6mm, surrounded by a circle of chain stitch in white linen and (2) an outer ring of six smaller pearls (4mm approx), each one again surrounded by a circle of chain stitch. It’s taken a bit of practice and some stars are better than others, but I am really pleased with the result.
The finished dress will have some weight to it, and I am looking forward to seeing how it will drape with the weight of the pearls.
It’s all taking some time! Basically, the shift took one day (6-8 hours), and the lining took another day (6-8 hours). The stars now take about 15-20 minutes each, and I am currently about one-third of the way through the second sleeve (and awaiting a new consignment of pearls). All in all, this is a true winter project which should keep me busy in between the novel-writing, recording of a new CD and the general music practice requirements… I expect my next ‘Manuscript Challenge’ post to be the completed overdress – sometime in January!


 ess (left) – just completed, and made from a vintage medium-heavy linen sheet I bought in France a couple of years ago. This underdress is very long (just over full-length) and nicely full, with a hem circumference of around three yards. I may end up shortening the underdress for practical use! For the overdress I have a lovely Italian blue wool and this dress will be lined in red linen. I have some lightweight white linen for the veil, left over from a previous project. I have a length of red wool for the mantle, which I will hopefully be able to line with the remainder of the underdress linen. l still need to decide on what to use for trimming the overdress and the veil – I have some silk/wool material I may use. For the belt I have various possible lengths of braid.


